Wednesday, August 29, 2012

Summer Vacation

I've been away for a good while and not sewing much, but thought I'd share the little bits of sewing that I did sneak in over the past month.

I'm working on two pillow covers for my living room, inspired by these.


I'm using Kaffe woven stripes for the background (LOVE!) and two vintage doilies from etsy. I'm nearly done hand stitching them down.  Maybe in the next week or so I'll get them all finished.  Fingers crossed!

And these are some HST blocks I'm playing with.
  

I don't know yet what they'll become, but a fabric combo popped in my head and I just had to play!  The black/white/grey fabric is from a goodie bag at an AQA event from last year. (Anyone going to AQA's Quilters Take Manhattan this year?  Trying to decide if I'm going to swing a whole afternoon away from the wee babe and go.  Sounds like fun!)

In any event, I'm ready to be back to more of a routine and looking forward to fall.

How was your summer, sewing and otherwise???

Thursday, July 5, 2012

July Quilting

I put out this little table runner for my entryway table yesterday.


I made it a couple of summers ago with blocks I won from an Empire Quilt Guild BOM challenge.  With all that red and blue, I just knew it was meant for the patriotic month of July!

In my home state of Utah, the 24th of July is a state holiday too.  With holidays on both the 4th and 24th, July always felt festive when I was growing up...lots of fireworks, watermelon, BBQ's, parades, sparklers, and red, white and blue!  This little runner reminds me of all those fun summer memories.   Can't wait to be back home for the 24th again this summer!

What are your looking forward to this summer?

Saturday, June 30, 2012

Siggy Quilt...a UFO

A few summers ago, I took muslin HSTs to several family reunions and gatherings with friends, collecting signatures everywhere I went.  Then they sat in my fabric bins for, well, years.  I just pulled them back out and started piecing them last week.  


Ahhhhhh....a finished block is so satisfying!  

What will you be working on this summer that has been languishing in your UFO pile?

Wednesday, June 27, 2012

Laurel Leaves for Two's Company

Shelly's Laurel Leaves block is finally done, the last of my blocks for Two's Company.  During her month she said she would be happy to get this block any time before the bee ended as there was so much hand work on it.  Whew!  I'm just in the nick of time!


Shelly's quilt is going to be lovely!  Check out the other blocks here.

In other red and white news, I stumbled upon this red and white quilt last night.  Just like our Two's Company Bee, it was inspired by the Infinite Variety show.  Isn't it lovely???

Do you have a favorite two color quilt?

Saturday, June 23, 2012

Splash! Pattern testing for Sunday Morning Quilts

I met the amazing Amanda Jean at a Minnesota quilting retreat in 2010.  Prior to meeting her I may have been a tiny bit intimidated by her.  I mean, you've seen how prolific her quilting is, right?  But in person?  Absolutely delightful! I even enjoyed jogging with her for heaven's sake!  

(Amanda in action at the retreat...with matching pedicure, none-the-less!)

Fast forward to last spring when she emailed me to share a little bit about a "secret" project in the works and to ask if I be interested in pattern-testing for her upcoming book.  Would I?  Of course!  (Someone who can talk me into jogging should have no trouble convincing me to quilt!)  So she sent along the pattern for "Splash", a quilt she made in lovely aqua and orange and a few of her own green scraps as a jumping off point.

Amanda's "Splash"

My favorite fabric from Amanda's scraps.  How can you not LOVE those froggies???

I dug through my stash and pulled out everything from lime green to turquoise for the background and purple for the accent.  I began with the purple focus block.


Inspired by the name "Splash", I wanted it to look like the focus block literally splashed into the quilt, scattering little bits of purple through out.  As a result, my quilt top took on a fairly different look from her high-contrast original.  


It was fun to take Amanda's idea and turn it into something all my own, all the while following her pattern.  I found her slab-making technique to be a great way to turn scraps into quilts...easy, organic, flexible and practical!  Pieces small and large could be easily worked into the top and it felt like play!  Try a little of this, add a little of that, work a favorite scrap in here, cut a funky angle there....


....then cut to the given measurements and sew those babies up.  Voila!

The approach turns an improvisational process into a beautiful finished product.  I was so pleased with this top that it was hard to not to share it with anyone before the book was published.  (Ok, I maybe sent Amanda an e-mail every now and then asking her if she'd seen the fun quilt top I'd finished as I had to tell somebody!)  So glad to finally get to share it here!  Ah....now if I could just get it quilted.

Do you have a favorite project from Sunday Morning Quilts?

Don't you want your own signed copy of Sunday Morning Quilts?

Tuesday, June 19, 2012

"Good Measure": A Finished Quilt and a Giveaway!

I love it when a project evolves organically, revealing itself to you a little bit at a time.  I started this quilt as a thank you gift for a dear family friend last fall with nothing more than a block idea and a color scheme.  I sewed block after block, unsure of the final layout.  I thought about adding a border, in part to easily make it larger (let's be honest!) but also to frame the blocks somehow.


Then after a trip to the Met a few months ago, I just knew I wanted the blocks to spill out into the borders.  It's funny because no specific piece of art evoked this.  It was more like seeing all those other uses of color and space sparked an image in my brain of what this quilt was meant to be.  I kept imagining the colors pouring across the quilt like water and overflowing the edges.


Then, as I was quilting it up, I kept wondering what I should title the quilt.  Something to do with water?  Something with fullness, wholeness or abundance?  After several days of wondering, the phrase "running over" came into my mind.  I knew it was a phrase from scripture and hunted it down.

"Give, and it shall be given unto you; good measure, pressed down, and shaken together, and running over, shall men give into your bosom. For with the same measure that ye mete withal it shall be measured to you again."
Luke 6:38

A scripture about generosity pouring blessings back into the heart and life of the giver?  Loved it!  It captured exactly what I'd like to wish for this dear friend! 

(A peek at the back, because I LOVE this fabric.  It's from Jennifer Sampou's "Fiesta" line.)

And now that the process is complete, might you be interested in using these few leftover blocks?  


Let me know and I'll gladly send them away! If more than one person is interested in the blocks, I'll draw a winner Monday morning.  Let me know if you only want one set or both.  If the winner only wants one, I'll draw for a second winner!     (The quilt blocks have been claimed by Sarah!  They'll be on their way soon!)

And I'd love to know....do you have a favorite serendipitous creative moment?  


Friday, June 1, 2012

Peppermint Strip Block Tutorial

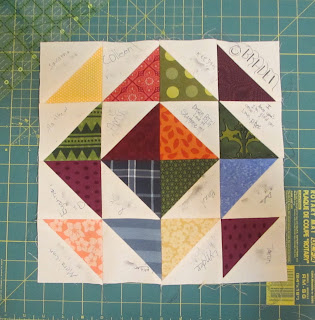
It's my month over at Two's Company and I decided I want to make a Christmas quilt of peppermint stick blocks.  I came up with a way that will keep from having to sew two bias edges together, thereby minimizing the stretch and distortion along the seam.  This method also keeps the majority of the outside edges of the block on grain, again minimizing distortion.  So here's the tutorial!

First, choose the fabrics you are going to use.  For the bee, I requested really RED reds, true whites and red-and-white prints.  I don't want fabrics with other contrasting colors, like this...

 
(Love this fabric...but too many other colors for this quilt.)

I chose white for my background, but feel free to use a red, red-on-white or white-on-red print for the background and then contrast it with the opposite for the stripes.  Here's the fabric I selected for the stripes in my Peppermint Stick strip.  


Cutting on the grain, cut a strip from your background fabric 35-45" long and a little wider than your desired width, anything between 3"-6" unfinished.


I cut my strip 35" x 6.5", giving myself ample width to trim it down to 5.5" once I am done.


Line up the long edge of your strip with the 45-degree line on your ruler...


...and cut diagonally across your strip.


Decide how wide you want your background stripes to be.  In this case, I chose to make them 5" wide.  Place your ruler-line for that measurement (in this case, my 5" measurement line) along the just-cut diagonal edge of your strip.  Cut your along the edge of the ruler.


Repeat until the entire strip is cut into diagonal pieces.


Measure the diagonally-cut edge.  In this case, it is 9.25".


Decide on how wide you want your inserted stripes to be.  I chose 2.5".  The length of your stripes is determined by adding the length of your diagonally-cut edge of background fabric and the desired width of your stripe.  Cutting on the grain, I cut stripes that were 12" long (9.25"+2.5"+.25" extra) and 2.5" wide.

Here's the fabric laid out how I planned to sew them together.


Line up the edge of one stripe with the with the background strip, with the corner of your stripe barely extending beyond the wide angle of your diagonally cut background fabric (not the narrow pointy edge).


It should look like this when you are ready to sew the seam.  (Yes, right sides are together...the white on white just shows through the back on this fabric.)


Sew the seam.  Press seam allowances to the dark side and trim the stripe to match the edge of your background fabric along the wide angled edge.  (Again, not the narrow pointy edge.)  It should look like this once it is trimmed.


Repeat with the next background piece and stripe.

Sew these pieces together, now lining up the pointy edge of one background piece to the wide-angled edge of the stripe piece below it.  The pointy corner should overlap just slightly so that your .25" seam will go right in the little v-shaped notch.


Repeat until all your pieces are connected into one long strip.  Press all seam allowances to the dark side.


Trim the strip to the desired width.  I trimmed it down to 5.5" wide.  


You're Peppermint Stick block is done!

For your signature block for the back, please cut a 2.5"x6.5" piece of plain white fabric (no white on white prints as fabric ink doesn't penetrate this and will smear or come off in the wash).  Cut two 2.5" squares.


Sew corner to cover on both the squares, going the same direction on both.


Trim the outside corners down to .25" same allowance and press toward the red.


Add your signature in black permanent fabric ink and include this signature block with your Peppermint Stick strip block.

Thank you lovely Two's Company ladies!  I can't wait to get these back in July and start sewing my first ever Christmas quilt.  Yeah!

Saturday, April 7, 2012

Blue and White for Two's Company


I really loved making this block!  While I was working on it, I kept thinking, "Man this is a satisfying block!"  I like the bear claws block, love blue and white, and really love the fun blue snakeskin fabric I found while making the aqua confetti quilt!!!

I think all the variety of blues in everyone's bee blocks are going to look great together.  (Check them out here.)  Hooray for the first blue and white quilt in our bee!  Hope you like it, Mary.

Friday, April 6, 2012

Quilt Top Finished

I finished this quilt top in just the nick of time to show at our NYC Metro Mod Guild meeting last Saturday.  Hooray for a "deadline" to give me the extra push I needed to get it finished!


In making this quilt, I hung a temporary design wall for the first time.  The only space big enough was my entryway.


It created a little chaos to have it there, but it was so helpful to be able to see the whole thing at once from a distance.  Now I love seeing the finished quilt top hanging there every time I walk down my hallway.

Do you use a design wall?  Where does it hang?  Any great temp design wall suggestions?

Friday, March 30, 2012

Baby Quilt for Margarets Hope Chest

The first quilt I ever finished found its home with Margarets Hope Chest this month.


It had been waiting in my hope chest for the arrival of a sweet child for, well, years.  When we adopted a little girl this past November, she was quickly inundated with more quilts and blankets than I ever imagined.  When I saw MHC's recent project gathering quilts to be given to mothers who participate in a prenatal class, I knew this quilt was supposed to go there.  As I lovingly wrap my wee babe in one of the blankets made by someone who loves her, it makes me happy to think of a quilt I made being lovingly wrapped around another baby far away by her mother.  And if the project encourages mothers to take a prenatal class too?  All the better!  Here's to happy and healthy babies!

Margarets Hope Chest has many fantastic projects going on this year.  If you'd like to help, check out their blog.  For March and April, their requested project is string blocks for three quilts.  How easy breezy is that?  You can get all the info here.

What's your favorite place to donate a quilt?

Sunday, March 11, 2012

A few bee blocks

I haven't been posting my bee blocks for the past few months here, but thought they'd be fun to share.  

Here are the last few for Two's Company....

...blue and brown for Jessica's boy...


...scrappy snowballs for Helen...


...and a circle of geese for Mary.


And the last blocks for One Block Over....

...framed birds for Carla.


I loved playing with the colors in the bird blocks and finding fun details to add, like the accenting the splash of red in the blue block of using my black and white city print.  I delighted in making them!

Are you sewing anything for someone else right now?